
Cracks and other openings in the doors and windows can cause air leaks in your San Antonio home. When this situation happens, you have to find a way of sealing the openings to avoid losing heat and inflating your energy bills. If you live in an older home, there’s a good chance you’re losing already heated or cooled air. Air leaks are almost expected in older homes, they’re so common. Typically coming from underneath doors and around windows, air leaks are drafty areas where your home isn’t protected from the elements of the outdoors. This creates more work for your HVAC system, along with worsening the air quality within your home. In this handy guide, we let you know how you can inspect your home for air leaks, and what you can do about them once you’ve found them.
Why Finding Air Leaks Is So Important
You might think a little leak around your windows is no big deal, and in the short term, it isn’t. Over time, however, those small amounts of energy loss add up to substantial amounts of wasted natural fuel and money. The more leaks your home has, the worse the problem will be and the more important it becomes for you to address the problem.
Lost fuel and money isn’t the only concern that comes with air leaks, especially if you or another member of your household has asthma, allergies, or other breathing issues. Air leaks let in particles of pollen and pollutants from the outside world. Without a great indoor air quality solution like a purifier, you’re essentially breathing in everything that’s outside.
Common Air Leak Locations
Almost every area of your home can have air leaks, many without your knowledge. Though you’ll easily feel air blowing in around an unsealed door, smaller leaks that happen in more out-of-the-way areas aren’t so obvious. Before you begin your inspection, it’s smart to be aware of the most common leak locations. These include, but aren’t limited to, the following.
- Windows and doors
- Wiring holes
- Chimneys and flues
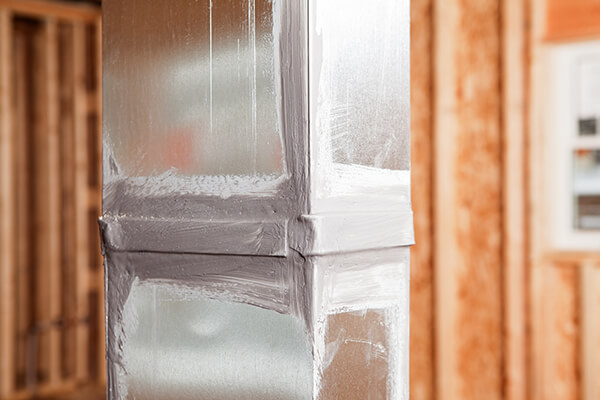
- Ductwork and other HVAC areas
- Inside the attics
- Garage walls
- Porch roofs
- Baseboards
Visually Inspect for Leaks
The first and most basic test you can perform is a thorough visual inspection of your home. First, inspect the outside of your home, everywhere two building materials meet or come together. Examples of this include corners, chimneys, and outdoor faucets. Next, check your doors and window frames for gaps or outdated weatherstripping, and reapply any that’s been damaged. Lastly, check indoors for any cracks or gaps in places like electrical outlets and switches, wiring, fans, attics, baseboards, and dryer vents. Any open area allows air to freely travel into and out of the home.
Building Pressure Test
Best done on a windy day, you’ll first have to turn off any appliance in your home that uses gas, including your furnace and water heater. Close all doors and windows, along with any fireplace flues. Use an oversized window fan to suck the air from your home, and then grab a candle or stick of incense. Light it and walk through your home, stopping by typical air leak areas. If the smoke is altered or seems pulled strongly toward an area, it’s likely that you have a leak that needs patching or insulating.
Utilize Professional Detection Services
Finding air leaks on your own can be tricky and take a lot of time. Professionals have access to the latest technology and tools, helping them accomplish the job in less time. Most professionals use the blower door test as the gold standard for finding leaks, a process that involves depressurizing your house with a blower fan in order to find the source of leaks. This is a more exact process and worth paying for.
Use Your Hand
This technique works best on cold days. All you need to do is to heat the interior so that the air inside is hotter than that flowing through the cracks. After heating, place your hand around the areas where you suspect the air is leaking through. Feel around the edges of the windows and doors. If there is a leak, you will feel the cold air blowing on your hands.
Use a Candle
The candle method is used for leaks that are small. These leaks may not be detected by your hand, but a candle will do the trick. Simply light a candle and pass it near the places that are likely to let air inside your house. Pay attention to the flame because when there is a leak, the flame will shake.
Depressurize the House to Find Air Leaks
Just like the hand test, depressurizing works best on a cold day. Just turn off the furnace and turn on all the fans in your house. Once all the fans are running, light a stick of incense and pass it gently near the vents, doors, and windows. If there is a leak, the smoke from the stick will either be blown out or sucked into the house.
Use an Air Leak Detector
Leak detectors work when you point them at the area where you suspect leakages. There are lights that will either turn blue or red depending on the temperature of the air. If there is no leakage, the light on the detector will not change.
These methods also work with ductwork. Simply turn on the HVAC unit and check around the ducts for leaks using the aforementioned methods. To seal leaks you will need to use caulk or some kind of foam sealant. Weather stripping can work with doors and windows.
Your Local Heating and Cooling Experts
Finding and sealing air leaks is easier with the help of our team of qualified, licensed professionals. Rosenberg Plumbing & Air has been working hard to address the needs of each of our San Antonio clients for more than three decades now. We always get the job done right the first time, at reasonable and affordable rates that keep people coming back, year after year. We offer installation and repairs on a wide range of heating and cooling systems that include heat pumps and ductless systems, as well as seasonal maintenance work. We even offer commercial services for businesses in the area. Call us and schedule an appointment so you can see the Rosenberg Plumbing & Air difference!
Tags: Air Leaks, Energy Efficiency, HVAC